Neurapix

The focus here is on how an image should feel. Color grading in Lightroom is the creative layer applied after correction: subtle hue shifts that turn summer greens into nostalgic olive, a gentle warm lift in highlights that makes a reception scene romantic, or a cooler, contrasty shadow treatment that gives sports coverage a cinematic edge. In short: correction builds trust; Lightroom colour grading creates emotion and defines brand identity.
The previous article covered how to color correct Lightroom images so whites stay neutral and skin tones look natural. Building on that foundation, this second part explores the creative process. The work stays entirely inside Lightroom Classic, relying on three core tools that deliver precise, repeatable results. The HSL/Color Mixer fine-tunes specific colors safely, the Color Grading wheels add tonal tints to shadows, midtones, and highlights with Balance and Blending control, and the Calibration panel shapes RAW color at the base, keeping whole galleries and even different cameras consistent.
Each tool has its strengths. The following sections show how to use them effectively, how to protect skin tones in people-focused genres, and how to adapt the same workflow for corporate and sports projects where brand colors must remain accurate. All of this sits in a simple sequence: correct first (as described in the previous article), then grade, then finish with local polish and export—optionally boosted by AI tools for speed without compromising a personal style.
Why grade? the creative layer
Even with perfect correction, real-world shoots jump between light qualities—blue noon shade, warm golden hour, magenta LED receptions, stadium tunnels. Colour grading in Lightroom is the unifying layer that makes a gallery feel like one story rather than a patchwork of rooms.
It’s also your brand voice. Families may suit airy pastels; couples may love candlelit warmth with clean, neutral shadows; sports often benefit from cooler shadows and punchy team colors. Done well, grading guides attention (warm, bright areas advance; cool, dark areas recede) and comes across as craftsmanship—not as a heavy-handed filter.
Bottom line: correction earns trust; color grading in Lightroom earns emotion and cohesion.
HSL/Color Mixer for subtle, skin-safe grades
If correction is your steady hand, HSL is your fine brush. It targets colors, not tonal ranges, so it’s the safest place to begin color grading in Lightroom for people-first work. Think in small moves (roughly ±2–8 Hue, –5 to –20 Saturation, ±5–15 Luminance). Because you already color correct Lightroom files, you won’t need heavy shifts.
Seasonal & Vintage Vibes (Greens > Olive, Blues Deeper)
Vintage summer / olive greens
Green Hue –5 to –15 (toward yellow)
Green Sat –5 to –20 (tame neon lawns)
Yellow Hue –5 to –10; Yellow Lum +5 to +15 (sun-kissed feel)
Optional: Blue Lum –5 to –15 for richer sky
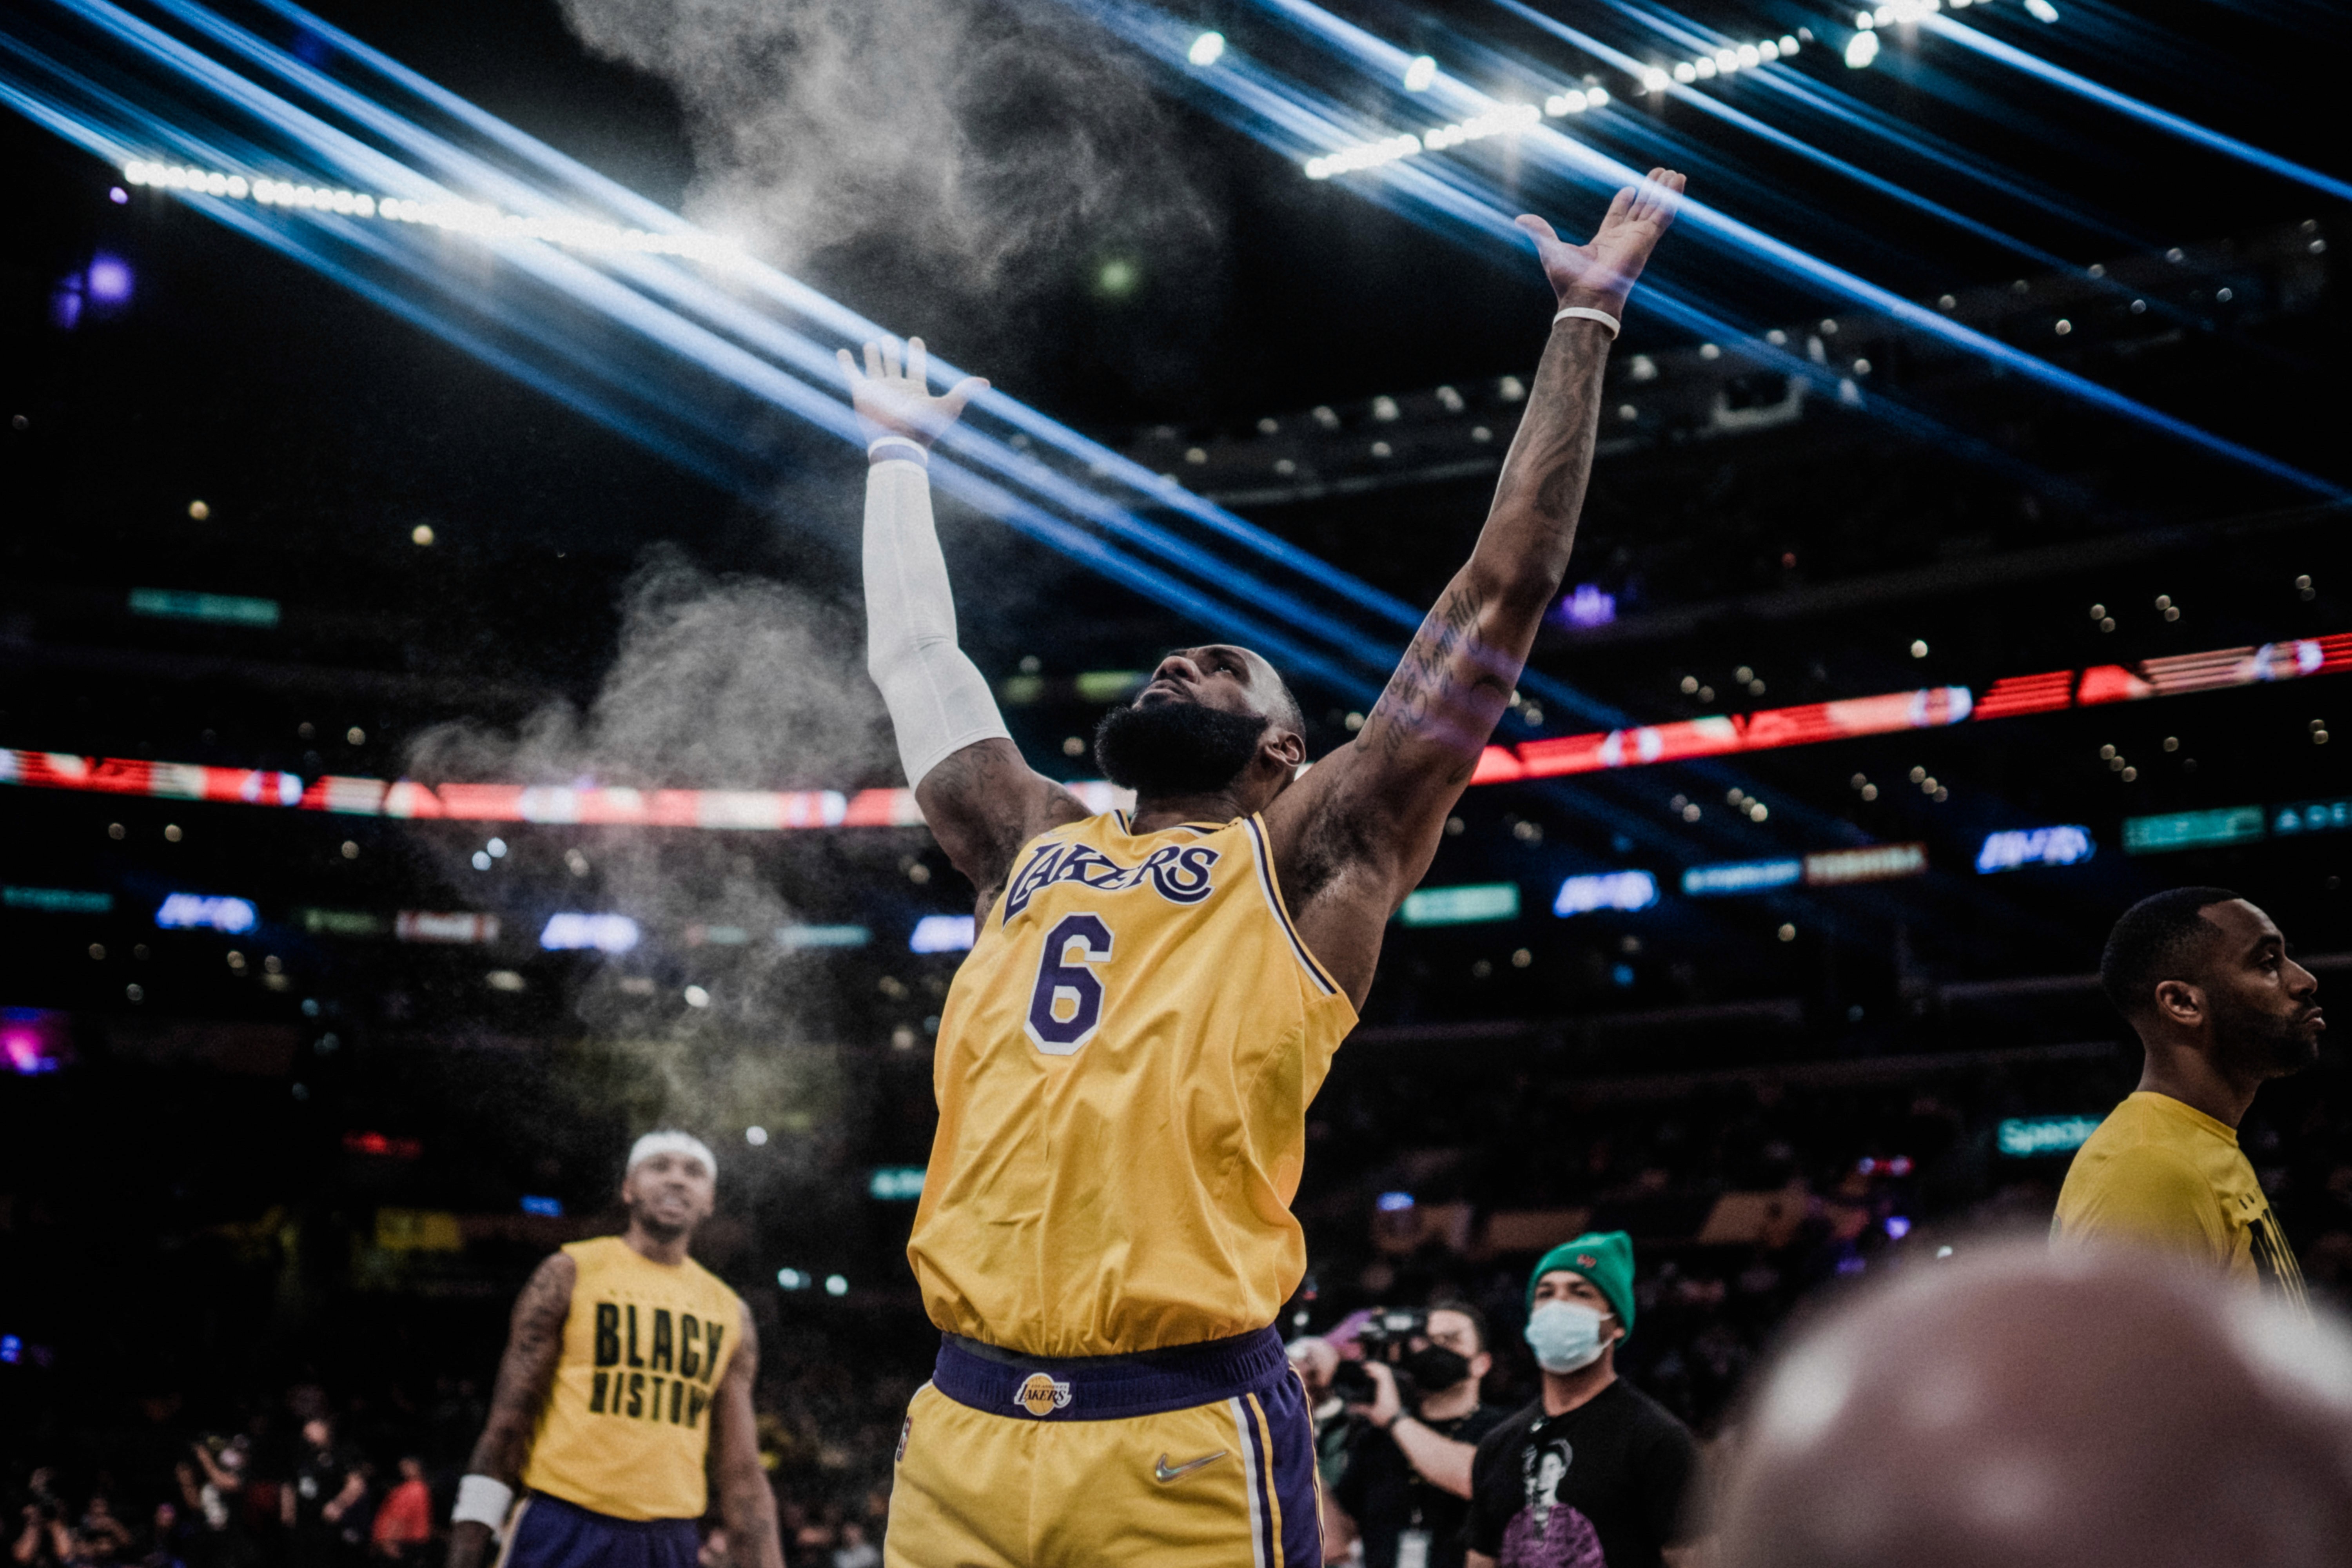
Crisp editorial / deeper sky (corporate exteriors, sports)
Blue Sat +5 to +15; Blue Lum –10 to –25
Aqua Hue –5 to –15 to push cyan toward true blue
Tip: Greens often live in Yellow as much as Green. Use the Targeted Adjustment Tool (TAT) and drag directly on foliage or sky—Lightroom moves the right sliders for the pixels you’re touching.

Photo: Formaphotography
Skin-Friendly Micro Moves
Because most skin tones live in the Orange channel with a hint of Red, even small HSL adjustments can make a significant difference. For a gentle golden look, shift Orange Hue slightly toward yellow (–2 to –6), lift Orange Luminance (+5 to +15), and calm redness with Red Hue (–2 to –6) and Red Saturation (–3 to –12). In cool venues where skin feels flat, add a touch of Orange Saturation (+3 to +8) and lift Orange Luminance (+5 to +10). Under harsh sun, do the opposite—reduce Orange Luminance (–5 to –10) and pull back Red Saturation (–5 to –10) to keep shine under control.
A couple of guardrails keep things safe: if warming skin causes teeth or whites to appear yellow, fix them locally with a quick desaturation brush (–10 to –20) instead of cooling the entire Orange range. If hair tips toward copper, balance it by nudging Yellow Hue down (–2 to –6) or reducing Yellow Saturation (–5).
From here, you can shape repeatable presets.
Light & Airy (families/newborns): Orange Hue –3, Orange Lum +10, reduced Yellow and Green saturation
Warm Romantic (weddings): Orange Hue –3 to –6, Yellow Lum lift, richer blues
Punchy Sports: Blue Sat +10 to +20, Blue Lum –10 to –20, subtle Orange Lum lift
Save these as grading presets that include HSL (and a gentle Curve if you like), but leave out white balance, exposure, and masks so they stay flexible across scenes.
When HSL alone isn’t enough—like when you need cooler shadows without affecting skin—switch to the Color Grading wheels for targeted tonal tints.
The Color Grading Panel (Three-Way Wheels)
If the HSL panel is your scalpel, the Color Grading wheels are your colorist’s toolkit. They give you separate control over Shadows, Midtones, and Highlights, with an optional Global wheel for an overall wash. On well-corrected files, even small saturation values (5–20) are enough to create mood without overwhelming skin tones.
Each wheel has three key controls: Hue sets the tint direction (teal, amber, rose); Saturation defines its intensity; and Luminance brightens or darkens that tonal range. Beneath the wheels, two master sliders refine the look: Balance decides which range dominates (left favors shadows, right favors highlights), while Blending controls how smoothly the ranges overlap (higher values create softer transitions).
A simple build might start with this intent: “Warm, romantic highlights, neutral-to-cool shadows, and honest skin.” To achieve that, anchor Shadows with a teal-blue hue (190–220, Sat 6–12), add champagne warmth to Highlights (Hue 30–60, Sat 6–15, with Highlights Luma –5 to keep dresses clean), and push Balance slightly toward the highlights (+10 to +25) so warmth carries more influence. Midtones can remain neutral, or you can add a whisper of warmth (Hue 20–40, Sat 3–8, Luma +2–6). A Global wash (Sat 2–6) is optional once the three wheels are in harmony.

Photo: Formaphotography
Three practical starting looks:
Warm & Romantic (weddings, newborns, couples): Shadows Hue 200–210, Sat 6–10; Highlights Hue 35–55, Sat 8–15, Luma –5; Balance +10 to +25; Blending 50–70. Faces glow naturally while cool shadows add depth without discoloring skin.
Dramatic & Moody (sports, urban, receptions): Shadows Hue 200–220, Sat 10–18, Luma –10 to –20; Highlights Hue 25–35, Sat 6–10; Balance –5 to 0; Blending 30–50. This creates a classic teal–orange feel but with restrained saturation.
Vintage/Filmic (families at golden hour): Shadows Hue 30–45, Sat 6–10, Luma –5; Midtones Hue 70–90 or 320–340, Sat 3–6; Highlights Hue 45–60, Sat 4–8, Luma –8; Balance +5 to +15; Blending 60–80. Amber shadows, muted highlights, and olive/rose midtones combine for a filmic look.
Protecting skin tones is critical. Keep Midtone saturation mild (3–8) and rely on Luminance (+2–6) for a natural glow instead of boosting saturation. If you’re pushing strong shadow tints, mask People or apply the grade to Background only. After grading, fine-tune Orange Hue and Luminance in HSL if faces have shifted. Also, limit Highlight saturation so whites stay clean, and use Highlight Luma –5 to –10 to control glare.

Photo: Formaphotography
Troubleshooting: muddy results usually need higher Blending and lower Shadow Saturation; if skin turns too orange, reduce Midtone Saturation, move Balance toward shadows, or adjust Orange Hue/Red Saturation in HSL; and if whites get tinted, pull back Highlight Saturation and rely on Balance/Blending to maintain mood.
Calibration: The Hidden Lever
Calibration controls how Lightroom maps RAW sensor data to RGB primaries. It’s a foundational step: even tiny moves here can reduce how aggressively you need to push HSL or the grading wheels later—resulting in cleaner skin and fewer side effects. Think of the pipeline as: Profile > Calibration > HSL > Wheels > Local polish.
Creative, skin-safe uses (keep moves small):
Teal skies: Blue Primary Hue –5 to –10; Saturation +5 to +15
Warmer, flattering skin: Red Primary Hue –2 to –6; Red Sat –5 to –10 (ideal if your camera runs “red hot”)
Cohesive foliage: Green Primary Hue +2 to +8; Saturation –5 to –15
Quieter shadows: Blue Primary Sat –5 to –10 to reduce blue noise
Cross-camera consistency: If you shoot with multiple bodies, align them through Calibration. Choose a neutral scene and a reference camera, edit one frame to taste with HSL/wheels off, then nudge the other body’s Calibration until skin, foliage, and blues match. Save a Calibration-only preset for each camera (by serial number) and apply it automatically on import.
Guardrails: If you’re beyond ±10 Hue or +20 Sat on a primary, double-check skin tones and neutrals. Use Calibration for character and alignment—not to fix mixed lighting (handle that locally instead).
Mask-aware grading (advanced)
Global grades are a strong foundation, but they often fall apart when harsh magenta uplights, projector casts, or orange-tinted tunnel lighting enter the mix. Mask-aware color grading in Lightroom lets you maintain your style while protecting skin tones and brand colors.
The principle is simple: grade the environment while preserving the people. Start with a global grade, then apply a People mask to keep skin natural—often just a tiny Temp adjustment (+2 to +5) and a small reduction in Saturation (–5 to –10) are enough to correct unwanted color spill. Skies and ambience benefit from dedicated masks too: deepen blues by adding saturation and reducing luminance, or warm a sunset with a slight Temp/Tint lift, all without affecting faces.
Problematic LEDs or projectors can be handled directly. Use a Color Range mask, select the offending hue, and either reduce saturation (–15 to –40) or nudge the hue toward a more natural tone. Intersect with the Background so jerseys and skin remain untouched. Clothes can also be separated from skin using the People > Clothes option or Object Select, allowing adjustments to clarity, contrast, or hue without altering natural tones. To protect whites, create a Luminance Range mask for the brightest areas, then apply slight desaturation and keep Tint/Temp neutral—this way, you can warm highlights globally without discoloring dresses or shirts.
Practical recipes:
Weddings & families: Apply a subtle teal shadow with warm highlights, balance toward the highs, lift faces slightly with Midtone Luma, add a touch of Dehaze to the background, strengthen skies with Blue Sat +10 and Blue Luma –10, and protect whites with a Luminance Range mask.
Sports & business: Use cooler shadows with restrained warm highlights. Keep faces clear with neutral Temp/Tint and a small Orange Luma lift, isolate brand colors with Color Range masks to adjust saturation or luminance, and calm distractions by lowering background exposure and saturation.
With these targeted adjustments, colour grading in Lightroom becomes more resilient: your global look stays intact, skin remains natural, and difficult light sources are corrected rather than taking over the mood.

Photo: Formaphotography
Mini case studies: how the grade travels across genres
Real assignments often move through very different lighting situations. The key is adapting your color grading in Lightroom without breaking skin tones or brand colors.
Wedding: from shade to sunset to LED reception
In shaded portraits, keep HSL moves light—Orange Hue around –3 and Orange Luminance +10—and add mood with the wheels: teal-leaning Shadows (Sat ~8) paired with warm Highlights (Sat ~10). Push Balance toward the highlights so faces feel luminous.
As golden hour arrives, let HSL do most of the work: brighten yellows (Luma +12), reduce green saturation (–10), and keep wheel adjustments subtle so skin stays natural.
At the reception, maintain consistency with masking: apply your warm-highlight grade globally, but subtract People masks to keep skin natural. Use a Color Range mask to reduce magenta LEDs (Sat –25 to –40) and a Luminance Range to protect whites. The result: a gallery that feels like one continuous story, even as light changes dramatically.
Corporate: from daylight to stage to networking
On the conference floor, neutralize cyan spill in HSL (Aqua Hue –10, Sat –10) and keep wheel saturation very low, relying on higher Blending (60–80) for a polished look.
On stage, mask the background screen and lower its saturation (–10) so presenters remain the brightest, warmest elements in frame; a touch of Highlight warmth (Sat 6–8) adds polish without discoloring shirts.
At networking events, keep Lightroom colour grading restrained. A slight Orange Hue shift (–2) keeps skin healthy, while Blue Hue –5 ensures corporate blues reproduce faithfully on badges and banners.
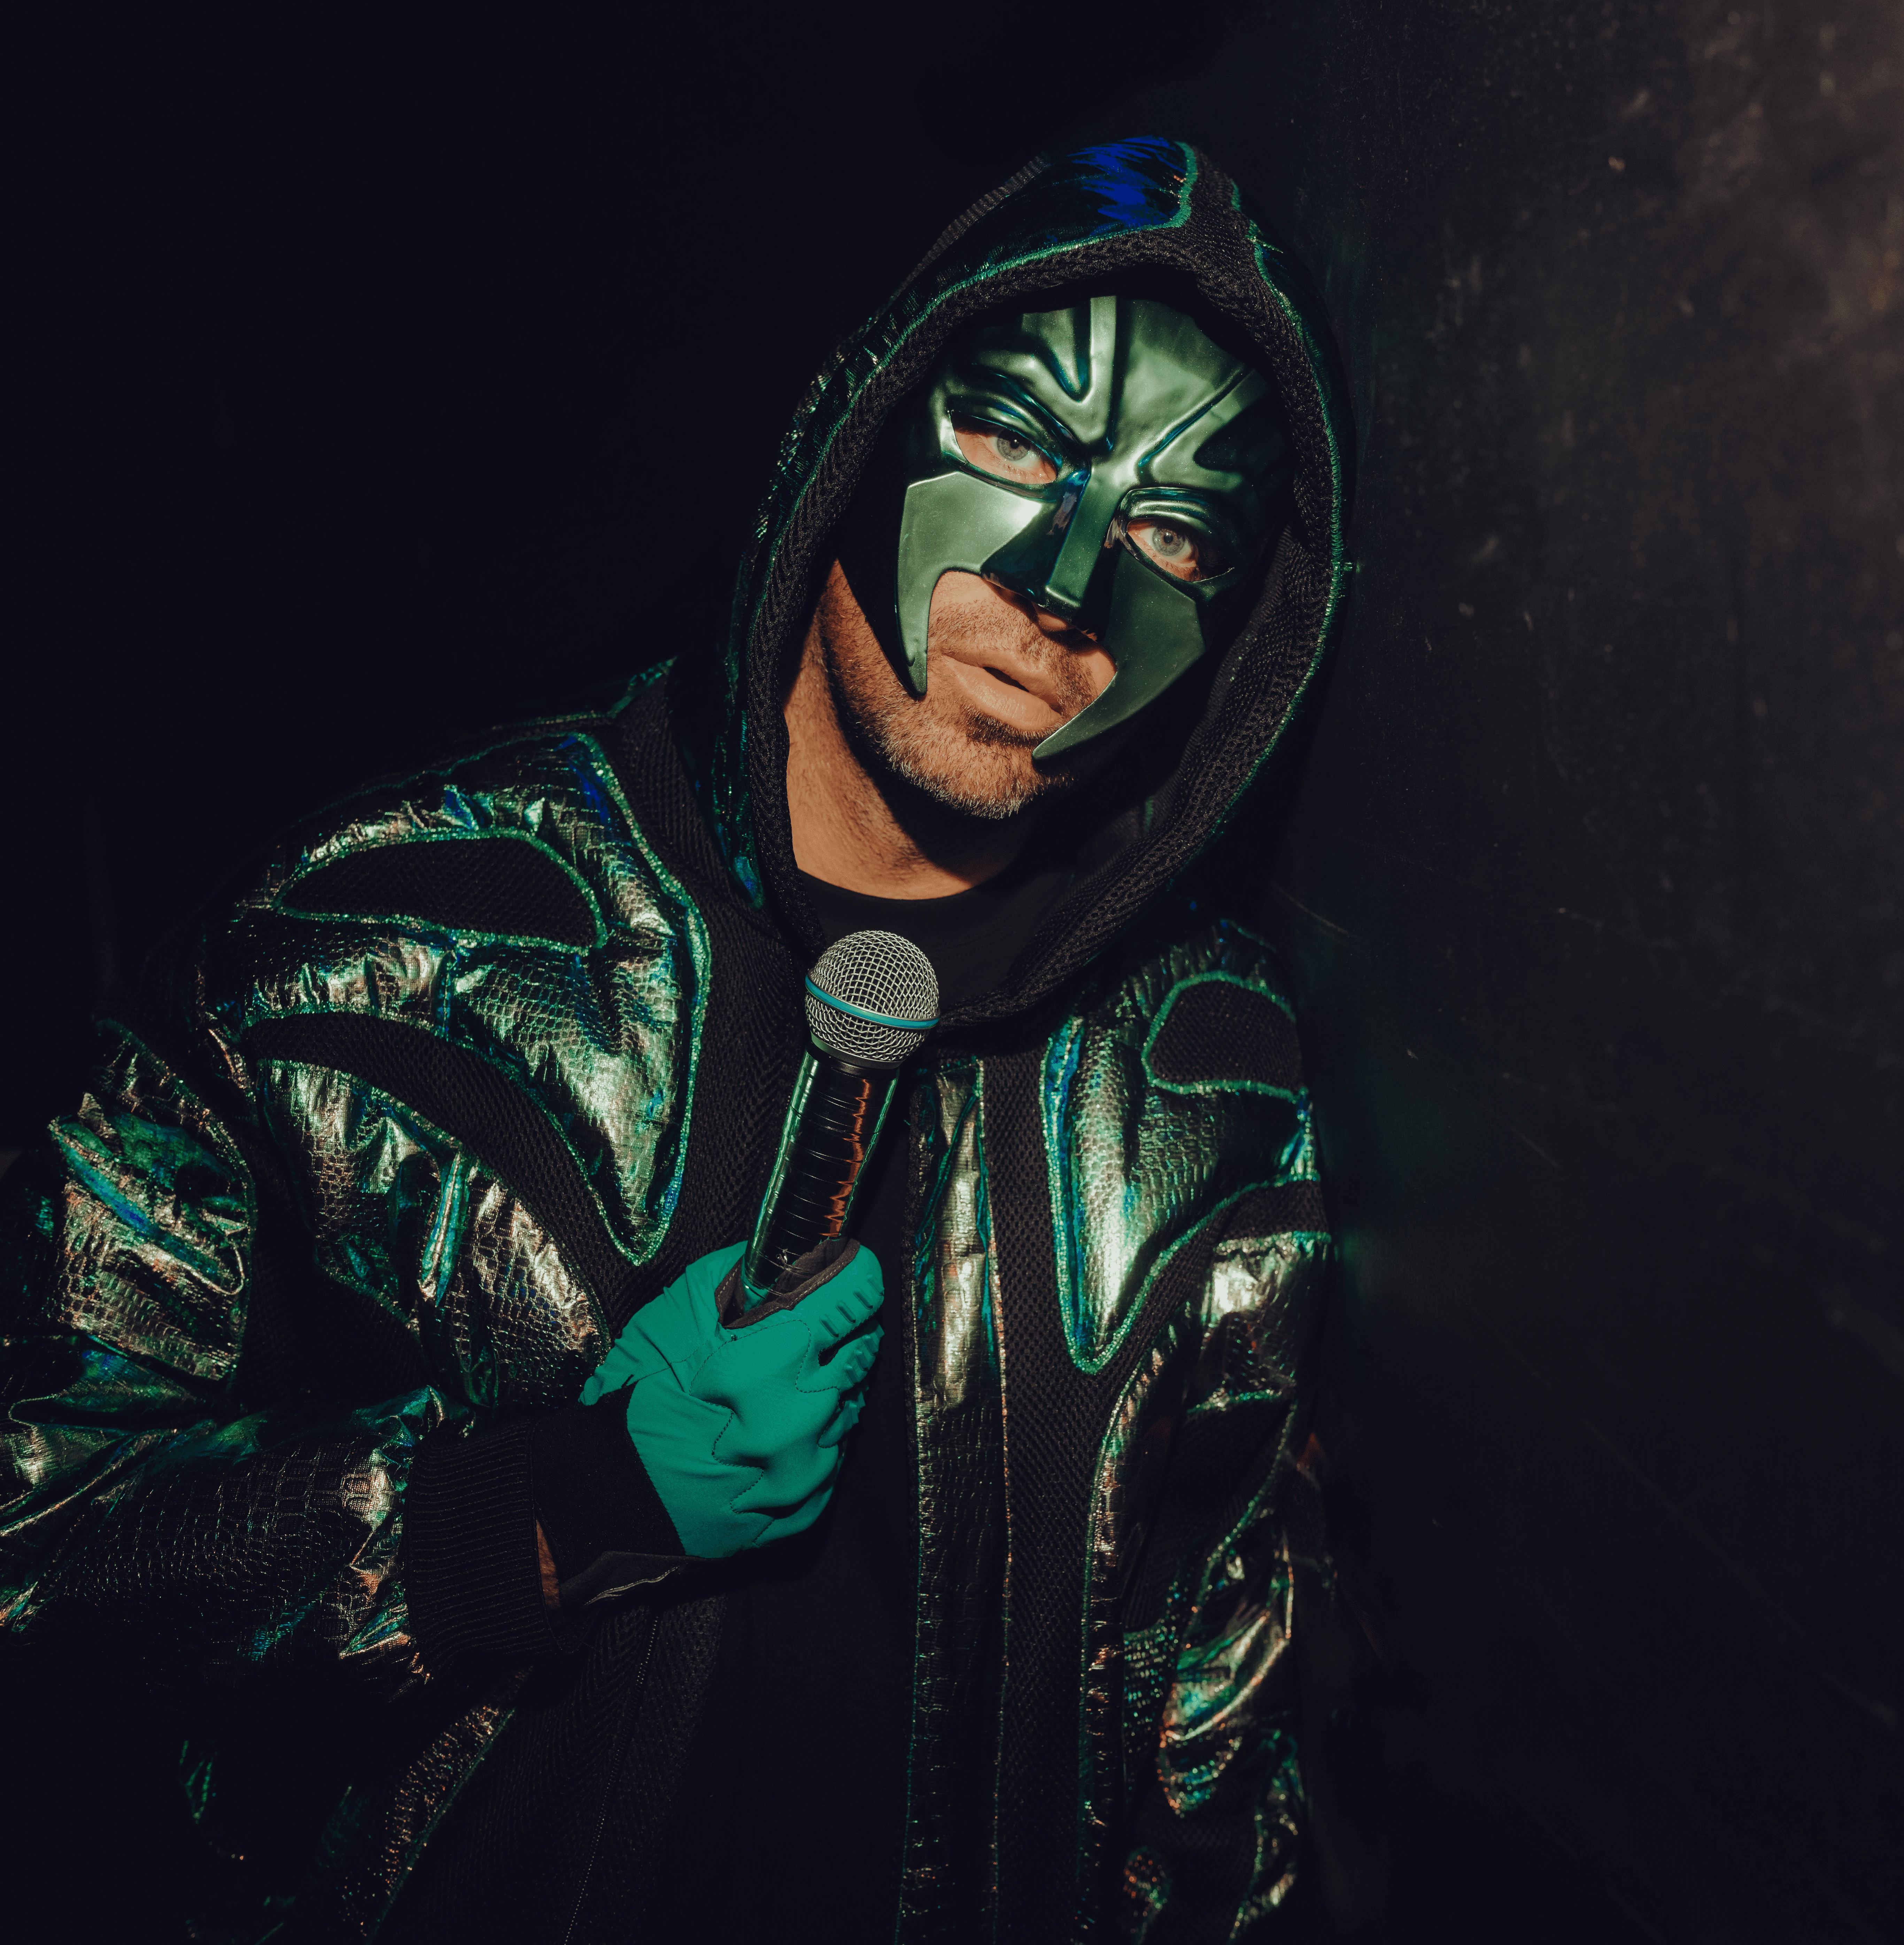
Sports: field, tunnel, night
On the midday field, use HSL to set the base: Green Hue –10 for natural turf, Blue Sat +10 and Blue Luma –15 for bold uniforms. Add grit with cooler Shadows (Sat 12–16) while keeping Highlight warmth light so whites stay clean.
In the tunnel, push Shadow Luminance down (–10 to –15) for drama, then lift Orange Luminance +5 on faces with a People mask so players stand out under helmets.
At night, control chaotic LEDs with targeted Color Range masks. Neutralize their saturation, then let your core grade carry through. This keeps your Lightroom colour grading cohesive across the entire match report.
From look to workflow
Good grading isn’t about improvising on every frame—it’s about having a repeatable sequence you can trust. The order matters, and if you stick to a structure that never works against you, your edits remain consistent and efficient. Start with correction (from Part 1), then move through Profile and Calibration, refine your palette in HSL, set the mood with the Color Grading wheels, and only afterwards apply local masks. A final round of HSL touch-ups will tidy any small side effects.
To maintain uniformity, anchor your workflow by scene. Pick one representative frame from each lighting block—whether it’s ceremony sun, open shade, an LED dance floor, or a corporate stage—and perfect it. Once it’s right, sync just the grading elements (HSL, wheels, Calibration if you use it) across the rest of the block. Add masks afterwards so each scene gets the local refinements it needs, without copying mismatched selections from one environment to another.
While you work, think small but look big. Zoom in for detail when fine-tuning skin, skies, or foliage, but always step back into Survey or Grid view and check a dozen thumbnails together. Cohesion across multiple frames is how your clients will experience a gallery. A grade that looks great on one file but doesn’t travel well across the set won’t hold up—Survey view helps ensure consistency.
Adaptive/AI presets (subject/sky-aware)
Build a conservative adaptive version of your look:
People: Midtone Luma +3–5; slight Temp/Tint to counter cool shadow spill
Sky: mild Blue/Aqua shaping or a gentle sunset lift
Background: a touch of Dehaze/Clarity to tidy without sharpening skin
The safer the preset, the more scenes it will survive. Add local “plus” moves to highlight hero frames.
Versioning is just as important. Lightroom makes it easy to experiment without re-editing from scratch. Use Virtual Copies to try alternate palettes side by side—such as a Romantic Warm version compared with a Clean Neutral. Snapshots are also valuable: save one right after Calibration and HSL, and another after your final grade. This allows you to roll back or branch off quickly if you want to test new directions.
Clear naming keeps things organized. Instead of vague labels, use practical names like Grade—WarmRomantic_v3 or Grade—CleanCorporate_v2. Finally, use Survey view to compare six to twelve frames across the day and select the version that carries best across changing light.
Scale up with AI (Neurapix)
Once your look is refined, volume becomes the next challenge. A learned assistant like Neurapix pairs seamlessly with color grading in Lightroom: it learns your finished corrections and grades and applies them quickly, leaving you free to focus on the final creative polish.
Neurapix in brief
Neurapix learns your editing style—from white balance, exposure, and HSL to the Lightroom Color Grading Wheels, Calibration, and even your local adjustments. It then creates a SmartPreset that reflects your personal look instead of applying a generic filter.
Training requires around 500–2,000 finished images that cover the lighting situations and genres you actually deliver. If you work with distinct styles (for example, Warm Romantic Weddings vs. Clean Corporate), create separate SmartPresets for each.
In practice, Neurapix acts as a fast first-pass editor. It applies your look across the full set, so you can step in for the creative polish: brighten faces, calm backgrounds, fix LEDs, or fine-tune per scene.
Keep your SmartPreset current by adding fresh reference edits over time and checking Calibration when you add new cameras. Ultimately, you remain the creative author—Neurapix simply provides speed and consistency at scale.
Export & delivery considerations
To protect your Lightroom colour grading all the way through to web, print, and press, treat export as the final, consistent step of your workflow.
For color space, keep it simple: deliver web galleries, client previews, and social files in sRGB. Most consumer and many pro labs also expect sRGB, unless they supply a custom ICC profile—in that case, soft-proof first and export for that target. When handing layered or edit-ready files to retouchers or design teams, export as 16-bit TIFF in Adobe RGB (or ProPhoto RGB if further grading is planned), using None/ZIP compression to preserve quality and headroom.
Bit depth and file type follow the same logic. Final client images are best as 8-bit JPEGs at Quality 80–90, which balance fidelity and file size. For press kits, master archives, or print-production handoff, use 16-bit TIFF (ZIP or uncompressed) so your carefully crafted grades survive further adjustments without banding.
Sharpen only once—at the end. Lightroom’s Output Sharpening is tuned to destination:
For digital delivery, choose Screen—Standard (bump to High only for very small web sizes).
For print, match sharpening to the paper type (Matte, Lustre, or Glossy), where Standard usually works well.
If a lab applies its own sharpening, export an unsharpened TIFF and let them handle it.
Size files for the medium, not the myth. For web and social, a long edge of 2048–3000 px at Q 80–90 is a crisp default (ppi doesn’t affect online display). For large prints and albums, export full-resolution files or scale to 4000–7000 px on the long edge and plan around 300 ppi in your print workflow.
Finally, keep whites truly white and brand colors consistent. Always embed the color profile on export, then spot-check on another device to confirm that dresses, shirts, and corporate backdrops remain neutral. For corporate/event work, compare exports to brand swatches in sRGB and adjust if needed so your Lightroom colour grading style stays consistent. Save a small set of reliable export presets—e.g., Web—sRGB 3000px Q85, Print—sRGB FullRes, Press—TIFF 16b AdobeRGB NoSharpen, Retouch—TIFF 16b ProPhoto ZIP—so every job leaves Lightroom consistent, predictable, and faithful to your signature grade.
Conclusion
Great grading is subtle confidence: HSL shapes your palette, the Color Grading wheels set the emotional tone, and Calibration makes the whole gallery cohere—even as you move from noon shade to LED dance floors or stadium tunnels. With mask-aware tweaks and smart adaptive presets, your Lightroom colour grading style becomes a signature that scales—recognizably yours, from first look to final export.


Neurapix is a German startup based in Göttingen. Founded in 2021, the company has developed an artificial intelligence that learns individual editing styles and applies them directly within Adobe Lightroom. This allows photographers to edit large volumes of photos in their personal style in a fraction of the time—saving them hours of work.

Start with 1,000 free AI edits.
Copyright © 2026 Neurapix GmbH. All rights reserved.