← All guides
Photo editing
Edit photos on the server
Upload your images and let Neurapix edit them comfortably in the background.
Upload + background
💡 Note: With Pay-per-Picture, editing always runs on the Neurapix server. With an Unlimited plan, you can also edit locally on your computer.
Step 01 — Select images
In the Library view, select all the images you want to edit.
Step 02 — Open the plugin
Go to Library → Plug-in Extras → Edit photos.
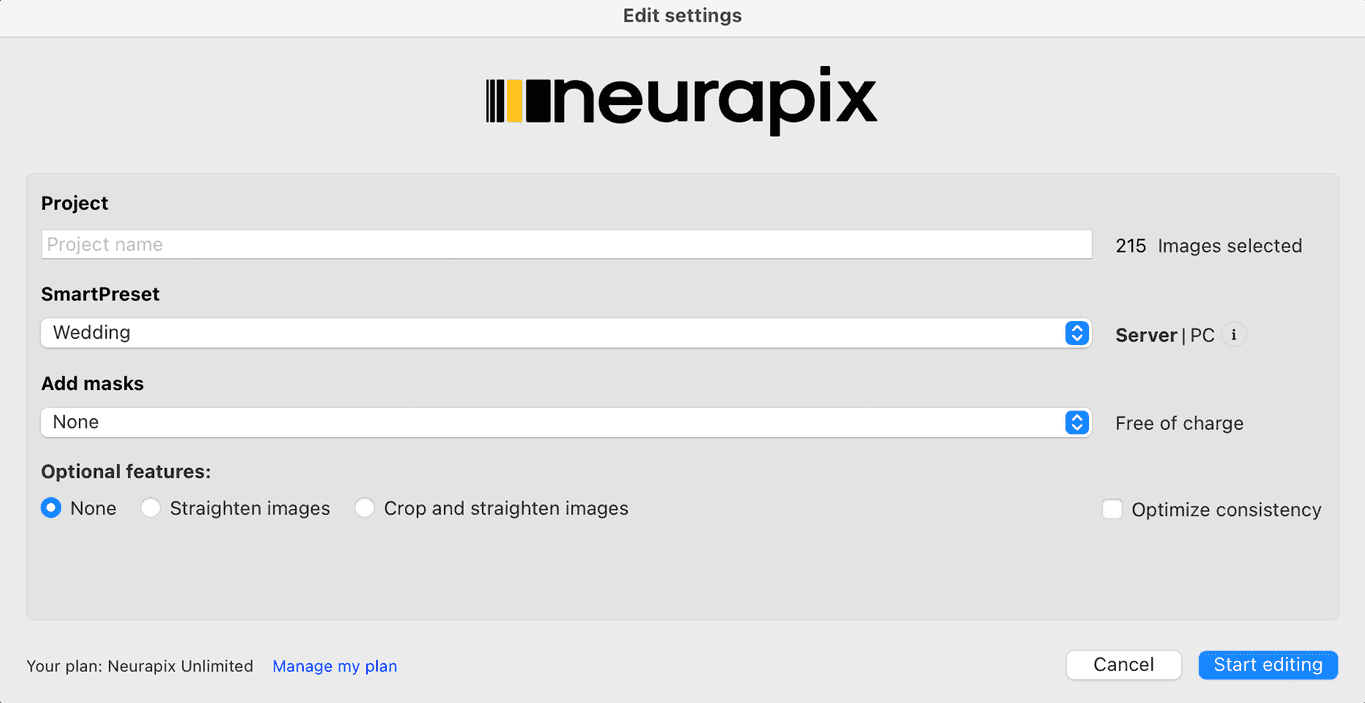
Step 03 — Set the options
In the “Editing settings” dialog, enter a project name and choose your SmartPreset. Make sure “Server” is selected as the processing location — not “PC”.
Optionally add masks or enable features such as “Straighten”. Then click “Start editing”.
💡 Tip: If photos have been edited before, Neurapix warns you that they will be overwritten.
Step 04 — Start the upload
Your images are now uploaded to the Neurapix server. A progress bar shows the upload status.
Step 05 — Wait for the notification
As soon as editing on the server is complete, you’ll receive an email notification from Neurapix.
Step 06 — Download the edit
Download the finished images in Lightroom via Plug-in Extras → Download edit → select project → OK.
Server editing complete.
Your computer stayed free — Neurapix did the work in the background.
Everything at a glance


Start with 1,000 free AI edits.
Copyright © 2026 Neurapix GmbH. All rights reserved.